Table of Contents
- Why the Wall is a Game-Changer for Your Pickleball Game
- Finding and Setting Up Your Pickleball Wall
- A Pro’s Repertoire of Solo Wall Drills
- Structuring Your Solo Practice Session for Maximum Impact
- The Mental Game of Solo Practice
- Common Mistakes to Avoid in Wall Practice
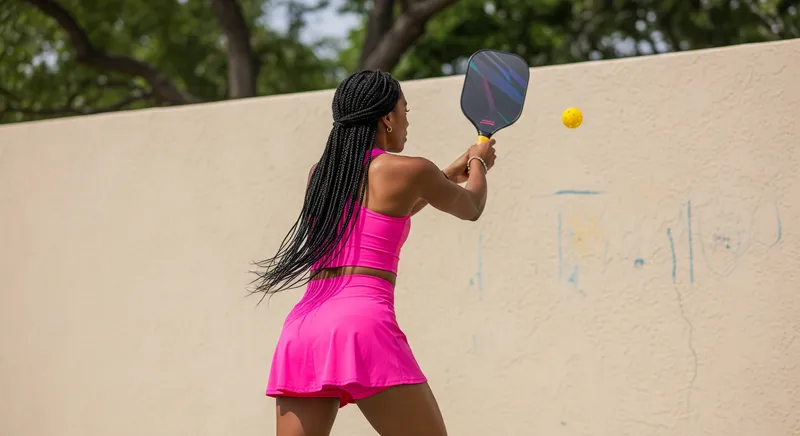
In the world of pickleball, the quest for improvement is a constant journey. We watch videos, take clinics, and seek out stronger opponents, all in the name of elevating our game. But what if one of the most effective and readily available practice partners isn’t a person at all? What if it’s something you probably have at home, in your neighborhood, or at a local park? Enter the humble wall – your silent, consistent, and ever-ready training companion.
This comprehensive guide will transform your perception of solo practice. We’ll delve into why the wall is an invaluable tool for players of all levels, from beginners seeking to build a solid foundation to seasoned pros looking to sharpen their edge. Get ready to discover how to turn any suitable vertical surface into your personal pickleball dojo, unlocking a new level of skill, consistency, and confidence in your game.
Why the Wall is a Game-Changer for Your Pickleball Game
Practicing against a wall offers a multitude of benefits that directly translate to improved performance on the court. It’s more than just hitting a ball against a surface; it’s a focused and efficient way to ingrain muscle memory and refine your technique.
- Unparalleled Consistency: The wall never misses. It returns every shot with a predictable trajectory, allowing you to focus purely on your form and execution without the variability of a human partner. This relentless consistency is a powerful teacher, forcing you to be precise and controlled.
- Accelerated Skill Development: The sheer volume of repetitions you can achieve in a short period is staggering. A 20-minute wall session can easily equate to hitting more balls than in a two-hour recreational game. This high-volume practice is the fast track to mastering new skills and solidifying existing ones.
- Enhanced Hand-Eye Coordination and Reaction Time: The ball comes back off the wall quickly, demanding sharp reflexes and precise hand-eye coordination. This constant and immediate feedback loop trains your brain and body to react faster, a crucial attribute in the fast-paced exchanges at the net.
- Laser-Focused Technique Refinement: Without the pressure of a game or the need to impress a partner, you can dedicate your full attention to the minutiae of your strokes. You can dissect your dinks, analyze your volleys, and perfect your third-shot drops with unwavering focus.
- Improved Footwork and Conditioning: The wall will have you moving. From subtle shuffles to more explosive lateral movements, practicing against a wall is an excellent workout that will improve your on-court agility and endurance.
- Ultimate Convenience and Accessibility: Your wall is always available. There’s no need to coordinate schedules or find a court. Whether it’s a quick 15-minute drill before work or a longer, more intensive session on the weekend, the wall is ready when you are.
Finding and Setting Up Your Pickleball Wall
Before you can start your solo practice revolution, you need to find the right canvas. Not all walls are created equal, and the right setup will make all the difference in the effectiveness of your training.
Choosing Your Wall:
- Surface: Look for a smooth, flat surface. Concrete, brick (with flat surfaces), or a dedicated practice wall are ideal. Avoid uneven surfaces that will cause unpredictable bounces. A garage door can work, but be mindful of the noise and any potential damage.
- Size: The larger the wall, the better. You want enough space to practice a variety of shots without feeling constrained. A wall at least 10 feet wide and 8 feet high is a good starting point.
- Location: Find a spot with ample space around you to move freely. You’ll need at least 10-15 feet of clear space in front of the wall to practice shots from different depths. Ensure the area is free of obstacles and hazards.
Setting Up Your Practice Court:
To simulate a real court and make your practice more game-like, a little setup with painter’s tape or chalk is highly recommended.
- The Net: Measure 34 inches from the ground and run a horizontal line of tape across the wall. This represents the height of the pickleball net at the center. For a more advanced setup, you can have the tape at 36 inches on the sides and sloping to 34 in the middle.
- The Non-Volley Zone (NVZ) or “Kitchen”: Measure 7 feet out from the wall and lay down a line of tape on the ground. This is your kitchen line. This is a crucial element for practicing your dinks and resets correctly.
- Targets (Optional but Recommended): Place smaller squares of tape on the wall as targets. This will help you focus on accuracy and placement for different shots. You can have targets for cross-court dinks, down-the-line drives, and serves.
A Pro’s Repertoire of Solo Wall Drills
Now that your practice space is set up, it’s time to get to work. The following drills are categorized to help you progress from foundational skills to more advanced techniques.
Beginner-Friendly Drills: Building the Foundation
- Forehand and Backhand Groundstrokes: Stand behind your kitchen line and let the ball bounce once before hitting a forehand drive against the wall. Focus on a smooth, controlled swing. Repeat on your backhand side. Aim for consistency, trying to hit the same spot on the wall each time.
- Basic Dinks: Stand just behind your kitchen line. Gently dink the ball over your taped “net,” letting it bounce once before each shot. Focus on soft hands and a controlled, compact motion. Alternate between forehand and backhand dinks. The goal is to keep the rally going for as long as possible.
- Volley Practice: Move closer to the wall, within the “kitchen.” Start by tossing the ball against the wall and volleying the rebound before it bounces. Focus on a short, punching motion. As you get more comfortable, try to keep a continuous volley rally going.
Intermediate Drills: Adding Complexity and Control
- Alternating Dinks and Volleys: Start with a few dinks, then, without stopping the rally, hit a volley. Then go back to dinking. This drill simulates the transition between the soft game and a more aggressive attack.
- Third-Shot Drop Practice: Start at a imaginary baseline (about 10-12 feet from the kitchen line). Toss the ball to yourself, simulate a serve, and then hit a third-shot drop that lands softly in your taped “kitchen.” The goal is for the ball to have a gentle arc and bounce low, making it difficult for an imaginary opponent to attack.
- Speed-Ups and Resets: Begin with a dink rally. After a few shots, hit a harder, more aggressive shot (a speed-up) at the wall. The ball will come back faster. Your goal is to then “reset” the rally by hitting a soft, controlled shot back into the kitchen. This is a fantastic drill for improving your ability to handle pace and regain control of a point.
- Figure-Eight Dinks: This drill improves your footwork and control. Stand in the middle of your kitchen line. Hit a forehand dink to one side of the wall, then shuffle your feet to hit a backhand dink to the other side, creating a figure-eight pattern.
Advanced Drills: Sharpening Your Weapons
- Attackable Ball Put-Aways: Practice hitting a slightly higher dink to the wall (simulating an opponent’s pop-up). As the ball comes back higher and deeper, step in and hit an aggressive volley or a swinging volley to a target on the wall.
- Rapid-Fire Volleys: Stand close to the wall and hit volleys as fast as you can, alternating between forehand and backhand. This is an intense drill that will significantly boost your hand speed and reaction time at the net.
- Around the Post (ATP) Simulation: If your wall has a corner, you can practice hitting around an imaginary net post. Stand to the side and practice hitting the ball at an angle so it wraps around the corner.
- Spin Practice: Focus on generating topspin on your drives and underspin on your slices. Pay close attention to how the ball comes off the wall with different spins. Be aware that a wall will not perfectly replicate the spin off an opponent’s paddle, but it can still be beneficial for developing the feel of different spins.
Structuring Your Solo Practice Session for Maximum Impact
To get the most out of your wall practice, it’s essential to have a structured plan. A well-organized session will keep you focused and ensure you’re working on all aspects of your game.
- Warm-Up (5-10 minutes): Start with some dynamic stretching and light jogging. Then, begin with gentle dinks and groundstrokes against the wall to get your body moving and your eye in.
- Drill Focus (15-30 minutes): Dedicate the bulk of your session to specific drills. You can focus on one or two skills you want to improve, or you can create a circuit of different drills. For example, you could do 5 minutes of dinks, 5 minutes of third-shot drops, and 5 minutes of volleys.
- Challenge and Game Simulation (5-10 minutes): End your session with a challenge. See how many consecutive dinks you can hit, or play a “game” against the wall where you have to hit specific targets to score points. This helps to simulate the pressure of a real match.
- Cool-Down (5 minutes): Finish with some static stretching to improve flexibility and prevent injuries.
The Mental Game of Solo Practice
Practicing alone requires discipline and a positive mindset. Here are some tips to stay engaged and motivated:
- Set Clear Goals: Before each session, decide what you want to achieve. It could be improving the consistency of your backhand dink or hitting 20 consecutive third-shot drops.
- Be Patient with Yourself: You will make mistakes. The key is to learn from them and not get discouraged. The wall is a judgment-free zone.
- Visualize Success: Before you hit a shot, visualize yourself executing it perfectly. This mental rehearsal can have a powerful impact on your physical performance.
- Keep it Fun: Put on some music, create fun games, and celebrate your progress. The more you enjoy your solo practice, the more likely you are to stick with it.
Common Mistakes to Avoid in Wall Practice
While the wall is a fantastic tool, it’s important to be aware of potential pitfalls to ensure you’re developing good habits.
- Neglecting Footwork: It’s easy to become stationary when practicing against a wall. Make a conscious effort to move your feet for every shot, just as you would in a game.
- Developing Bad Habits: The wall doesn’t give you feedback on an awkward-looking but effective shot. Be mindful of your technique and consider recording yourself to analyze your form.
- The Spin Anomaly: Remember that a ball with topspin hit against a wall will come back with underspin, and vice versa. This is different from how a ball comes off an opponent’s paddle. Be aware of this and focus more on your stroke mechanics and contact point rather than solely on the ball’s trajectory off the wall.
- Only Practicing Solo: Wall practice is a supplement to, not a replacement for, playing with real people. The unpredictable nature of a human opponent is something you can only experience on the court.
The wall is more than just a backboard; it’s a dedicated and demanding practice partner that can unlock your true potential as a pickleball player. By embracing solo practice and incorporating these drills and strategies into your training regimen, you’ll not only see a dramatic improvement in your skills but also develop a deeper understanding and appreciation for the nuances of this incredible sport. So, find your wall, grab your paddle, and get ready to become the best player you can be. Your future opponents won’t know what hit them.
Leave a Reply